Breathing Techniques for Stress Relief
Read on to learn how to do 10 different Breathing Techniques for Stress Relief. You may find that certain respiratory exercises appeal to you right away.
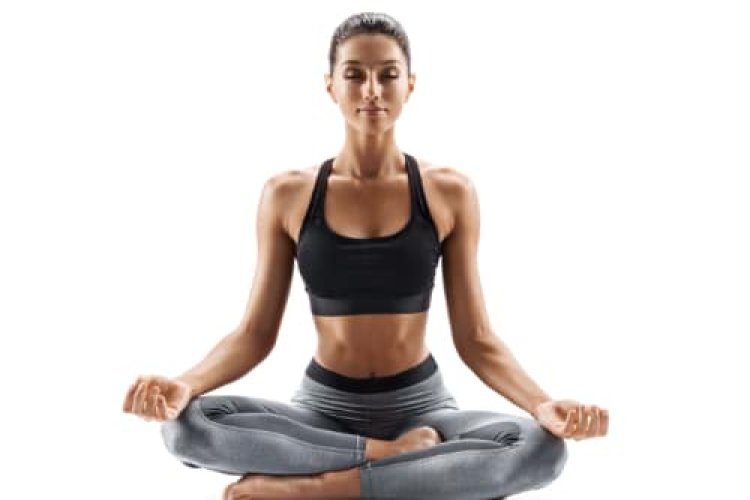
Breathing Techniques for Stress Relief: There are a number of breathing techniques that may help you feel calmer and more relaxed if you are experiencing elevated levels of stress or anxiety. It's simple to initiate. You only need a peaceful space where you can focus on your breathing.
Breathing exercises do not have to consume a great deal of time. It is simply a matter of setting aside time to focus on your respiration. Here are some suggestions to get you started:
- Begin with just 5 minutes a day, and increase your time as the exercise becomes easier and more comfortable.
- If 5 minutes feels too long, start with just 2 minutes.
- Practice multiple times a day. Schedule set times or practice conscious breathing as you feel the need.
Read on to learn how to do 10 different Breathing Techniques for Stress Relief. You may find that certain respiratory exercises appeal to you right away.

10 Breathing Techniques for Stress Relief
1. Pursed lip breathing
To do it:
- Relax your neck and shoulders.
- Keeping your mouth closed, inhale slowly through your nose for 2 counts.
- Pucker or purse your lips as though you were going to whistle.
- Exhale slowly by blowing air through your pursed lips for a count of 4.
2. Diaphragmatic breathing
Diaphragmatic breathing (also known as abdominal breathing) can aid in the correct use of the diaphragm.
According to a 2020 meta-analysis, this form of breathing is especially beneficial for individuals with breathing difficulties due to chronic obstructive pulmonary disease (COPD), heart disease, or cancer.
It may also aid in tension reduction and the management of eating disorders, constipation, high blood pressure, migraine attacks, and other health issues.
Perform diaphragmatic breathing three to four times per day for five to ten minutes.
Initially, you may feel exhausted, but with practise, the technique should become simpler and more natural.
- Lie on your back with your knees slightly bent and your head on a pillow.
- You may place a pillow under your knees for support.
- Place one hand on your upper chest and one hand below your rib cage, allowing you to feel the movement of your diaphragm.
- Slowly inhale through your nose, feeling your stomach pressing into your hand.
- Keep your other hand as still as possible.
- Exhale using pursed lips as you tighten your abdominal muscles, keeping your upper hand completely still.
You can place a book on your abdomen to make the exercise more difficult. Once you learn how to do belly breathing lying down, you can increase the difficulty by trying it while sitting in a chair. You can then practice the technique while performing your daily activities.
3. Breath focus technique
This deep breathing technique uses imagery or focus words and phrases.
You can choose a focus word that makes you smile, feel relaxed, or is simply neutral. Examples include peace, let go, or relax, but it can be any word that suits you to focus on and repeat through your practice.
As you build up your breath focus practice, you can start with a 10-minute session. Gradually increase the duration until your sessions are at least 20 minutes.
To do it:
- Sit or lie down in a comfortable place.
- Bring your awareness to your breaths without trying to change how you’re breathing.
- Alternate between normal and deep breaths a few times. Notice any differences between normal breathing and deep breathing. Notice how your abdomen expands with deep inhalations.
- Note how shallow breathing feels compared to deep breathing.
- Practice your deep breathing for a few minutes.
- Place one hand below your belly button, keeping your belly relaxed, and notice how it rises with each inhale and falls with each exhale.
- Let out a loud sigh with each exhale.
- Begin the practice of breath focus by combining this deep breathing with imagery and a focus word or phrase that will support relaxation.
- You can imagine that the air you inhale brings waves of peace and calm throughout your body. Mentally say, “Inhaling peace and calm.”
- Imagine that the air you exhale washes away tension and anxiety. You can say to yourself, “Exhaling tension and anxiety.”
4. Lion’s breath
The energising yoga breathing technique known as lion's breath is said to relieve tension in the chest and face.
It’s also known in yoga as Lion’s Pose or Simhasana in Sanskrit.
To do this:
- Come into a comfortable seated position. You can sit back on your heels or cross your legs.
- Press your palms against your knees with your fingers spread wide.
- Inhale deeply through your nose and open your eyes wide.
- At the same time, open your mouth wide and stick out your tongue, bringing the tip down toward your chin.
- Contract the muscles at the front of your throat as you exhale out through your mouth by making a long “haaa” sound.
- You can turn your gaze to look at the space between your eyebrows or the tip of your nose.
- Do this breath 2 to 3 times.
Alternate nostril breathing, known in Sanskrit as Nadi Shodhana Pranayama, is a relaxation-inducing breathing technique.
It has been demonstrated that alternate nostril breathing improves cardiovascular function and reduces pulse rate.
Nadi Shodhana is best practiced on an empty stomach. Avoid the practice if you’re feeling sick or congested. Keep your breath smooth and even throughout the practice.
To do this:
- Choose a comfortable seated position.
- Lift your right hand toward your nose, pressing your first and middle fingers down toward your palm and leaving your other fingers extended.
- After an exhale, use your right thumb to gently close your right nostril.
- Inhale through your left nostril and then close your left nostril with your right pinky and ring fingers.
- Release your thumb and exhale out through your right nostril.
- Inhale through your right nostril and then close this nostril.
- Release your fingers to open your left nostril and exhale through this side.
- This is one cycle.
- Continue this breathing pattern for up to 5 minutes.
- Finish your session with an exhale on the left side.
Sama Vritti is the Sanskrit word for equal respiration. This breathing technique concentrates on making your inhales and exhales equal in duration. Bringing about equilibrium and equanimity by maintaining a smooth and constant breath.
This technique may enhance mental health and increase the oxygen supply to the brain and lungs, according to research on older individuals with hypertension.
You should find a breath length that is neither too difficult nor too simple. In order to maintain it throughout the practise, it should not be too rapid. Typically, between three and five counts are used.
Once you become accustomed to equal breathing while seated, you can incorporate it into your yoga practise and other activities.
To do it:
- Choose a comfortable seated position.
- Breathe in and out through your nose.
- Count during each inhale and exhale to make sure they are even in duration. Alternatively, choose a word or short phrase to repeat during each inhale and exhale.
- You can add a slight pause for breath retention after each inhale and exhale if you feel comfortable. (Normal breathing involves a natural pause.)
- Continue practicing this breath for at least 5 minutes.
Resonant breathing, also referred to as coherent breathing, is when you take five complete breaths per minute. This rate can be attained by inhaling and exhaling for five counts.
This rate of breathing maximises heart rate variability (HRV), reduces tension, and, according to a study published in 2017, can reduce depressive symptoms when combined with Iyengar yoga.
To do this:
- Inhale for a count of 5.
- Exhale for a count of 5.
- Continue this breathing pattern for at least a few minutes.
This yoga breathing practice helps you lower your body temperature and relax your mind.
Slightly extend your breath in length but don’t force it. Since you inhale through your mouth during Sitali breath, you may want to choose a place to practice that’s free of any allergens that affect you and air pollution.
To do this:
- Choose a comfortable seated position.
- Stick out your tongue and curl your tongue to bring the outer edges together.
- If your tongue doesn’t do this, you can purse your lips.
- Inhale through your mouth.
- Exhale out through your nose.
- Continue breathing like this for up to 5 minutes.
Also read: Health Benefits of Papaya
Deep breathing alleviates shortness of breath by preventing air from becoming trapped in the airways and allowing the inhalation of fresher air. You may feel more relaxed and centred as a result.
To do this:
- While standing or sitting, draw your elbows back slightly to allow your chest to expand.
- Take a deep inhalation through your nose.
- Retain your breath for a count of 5.
- Slowly release your breath by exhaling through your nose.
10. Humming bee breath (Bhramari)
This yoga breathing practice’s unique sensation helps create instant calm and is especially soothing around your forehead.
Some people use humming bee breath to relieve frustration, anxiety, and anger. Research shows it
Of course, you’ll want to practice it in a place where you’re free to make a humming sound.
To do this:
- Choose a comfortable seated position.
- Close your eyes and relax your face.
- Place your first fingers on the tragus cartilage that partially covers your ear canal.
- Inhale and gently press your fingers into the cartilage as you exhale.
- Keeping your mouth closed, make a loud humming sound.
- Continue for as long as is comfortable.
The takeaway
You can try most of these breath exercises right away. Take the time to experiment with different types of breathing techniques. Dedicate a certain amount of time at least a few times per week. You can do these exercises throughout the day.
Check in with your doctor if you have any medical concerns or take medications. If you want to learn more about breathing practices, you can consult a respiratory therapist or a yoga teacher who specializes in breathing practices. Discontinue the practice if you experience any feelings of discomfort or agitation.